


| Stay Connected | Quick Links | ||||||||||||||||||
| Derivan HealtheClean |
Derivan Anticrib |
Colour Charts |
SDS | Images | Derivan Apps Downloads |
||||||||||||||

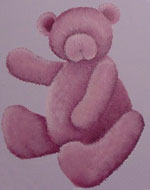
Memory Box Teddy
Designed for beginners
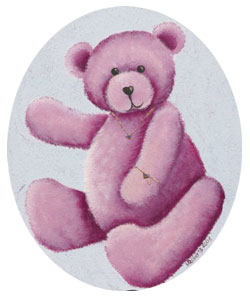
by Michelle Roberts © 2003
Download the Teddy Pattern
Materials Required
|
Brushes ¼” Stipple (deerfoot) brush Liner of choice Old brush for glitter. Equipment |
Preparation
Using the 1" short flat brush, basecoat the wooden inside piece with 2-3 coats of Gum Tree Green basecoat, sanding after each coat except the final one with 600 or 800 grit Wet and Dry sandpaper.
Hint: To find out if you've sanded enough, gently rub your hand over your piece to feel how smooth it is,
Hint: Do not put your paint on too thickly; it will crack as it dries and you will have to sand it back. If your paint is thick (in the tub), add some Acrylic Painting Medium to it first and stir it in well.
Hint: Always basecoat your piece at least twice. The first coat will seal the piece, the second will get a better, and smoother, coverage
Hint: Don't sand before basecoating, unless there's little burrs on the routered edge. The craftwood will become furry if you do.
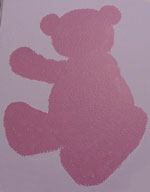
• Using the Saral Paper, transfer the pattern onto your piece
Painting Instructions
-
Using ¼” Stipple brush, stipple in a mixture of Ash Pink and Burgundy 4:1.
-
Using the same brush (no need to wash it out), pick up a little burgundy into the tip, and wiggle it into the brush.
-
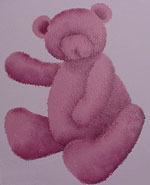
Stipple in shadow areas, with the brush pointing towards the darkest areas. Hint: Use a small circular motion to stop lines forming. Overlap brush stipples.
-
Wash brush out, and blot dry.
-
With base colour pink mix on the heel of the brush, wiggle the tip into Ash Pink, and stipple in highlights. Hint: As the brush runs out of paint, lightly stipple into the shadow areas to blend in.
-
Add eyes, nose and mouth using Burnt Umber and a liner brush. Add highlights by picking up a little Titanium White with the dirty brush.
-
Mix a little Burnt Umber with Metallic Gold, and with liner, paint in chain and hearts.
-
Dab a little Titanium White to the tops of the hearts, and on some of the links of the chains using the liner brush.
-
Add a shadow to the right of the hearts using the liner brush and Burnt Umber.
-
Add a small keyhole to the bottom of each heart by adding a small line of Burnt Umber.
-
Using a small amount of Cobalt Blue, with a touch of Titanium White, loosely paint in the bluebirds.
-
Mix up all the pinks remaining on your palette to add a feature line, or any other trim you please.
-
Paint over edges, or whole design with a small amount of Glitz-a-Matazz Crystallina (just squeeze it onto your palette like other paints) for a little bit of magic.
Finishing Off
- Sign your name (or initials) and the year on your work! i.e. I would sign mine MR03
- Make sure everything is dry and then gently rub out any transfer lines with a kneadable eraser.
- Dry and double check that you're happy with everything. Wipe over with a damp chux to clean up any fingerprints.
- Varnish!
- If you are spray-varnishing, do it in a well ventilated area, away from any asthmatics! Start spraying from off your piece and work left to right (or R-L) taking each spray off the piece. Work also from the bottom up, that way you push any excess varnish up - this help stop dribbles!
SHOW ALL YOUR FRIENDS WHAT A CLEVER PERSON YOU ARE!